Surveys
The Surveys section in Team Space allows you to create, manage, and analyze surveys within your projects. This feature enables teams to gather valuable feedback from clients and stakeholders efficiently. By enabling surveys in your project settings and assigning the appropriate roles, users can access a dedicated survey dashboard to design, deploy, and review survey responses. This documentation will guide you through the steps to activate surveys, assign roles, and utilize the survey dashboard effectively.
Content
- Introduction
- Overview of Surveys in Team Space
- Activating Surveys for a Project
- Steps to Enable Survey Feature
- Assigning Survey Manager Role
- How to Set Roles for Survey Management
- Accessing the Survey Dashboard
- Navigating the Survey Dashboard
- Viewing and Managing Surveys
- Creating and Managing Surveys
- Adding a New Survey
- Editing Existing Surveys
- Survey Success Pages
- Survey Rules
- Configuring Survey Rules
- Examples of Survey Rules
- Form Fields Configuration
- Help Text, Placeholder Text, and Predefined Values
- Validating Text and Numeric Fields
- Additional Features
- Auto-Save
- Enabling CAPTCHA on Survey Submissions
- Survey Notifications
- Redirecting Users
- Autocompleting Text Fields
Activating Surveys for a Project
To use the survey feature in Team Space, you must activate it for each specific project where you want to utilize surveys.
- Navigate to Project Settings: Go to the project where you want to enable surveys.
- Enable Surveys: Toggle the survey option to activate it for the project.
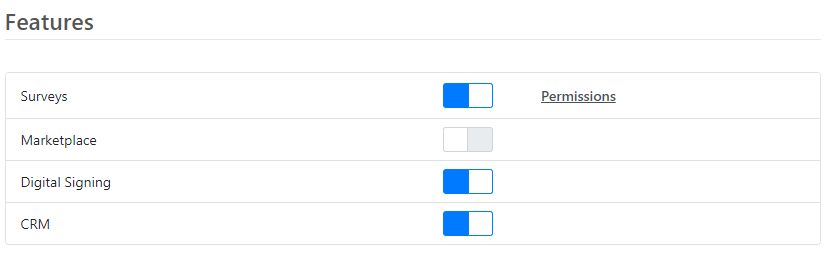
Enable Surveys
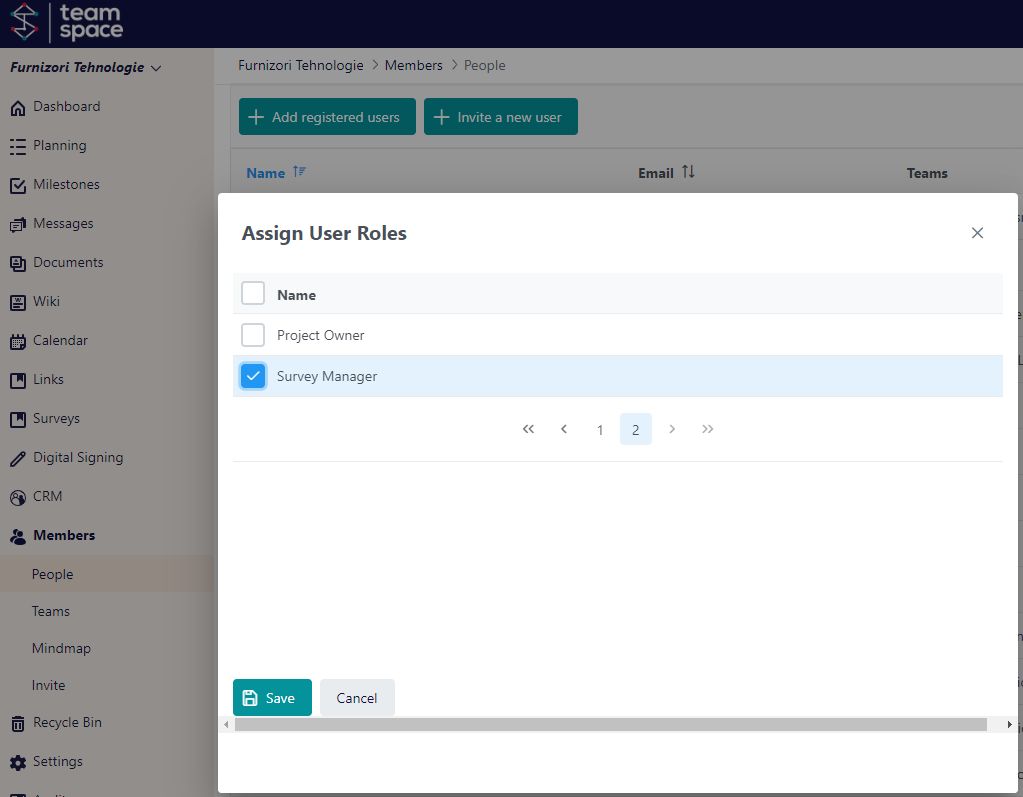
Assigning Survey Manager Role
To give users access to manage surveys:
- Go to Project Settings: Navigate to
Project Settings -> People. - Set Roles: Assign the
Survey Managerrole to the desired users. This role will grant them access to the Survey menu.
Accessing the Survey Dashboard
Once surveys are enabled and roles assigned, users can access the Survey Dashboard:
- Survey Menu: Find the
Surveysoption in the project’s left-hand menu. - Survey Dashboard Overview: The dashboard displays a list of surveys in a table format.
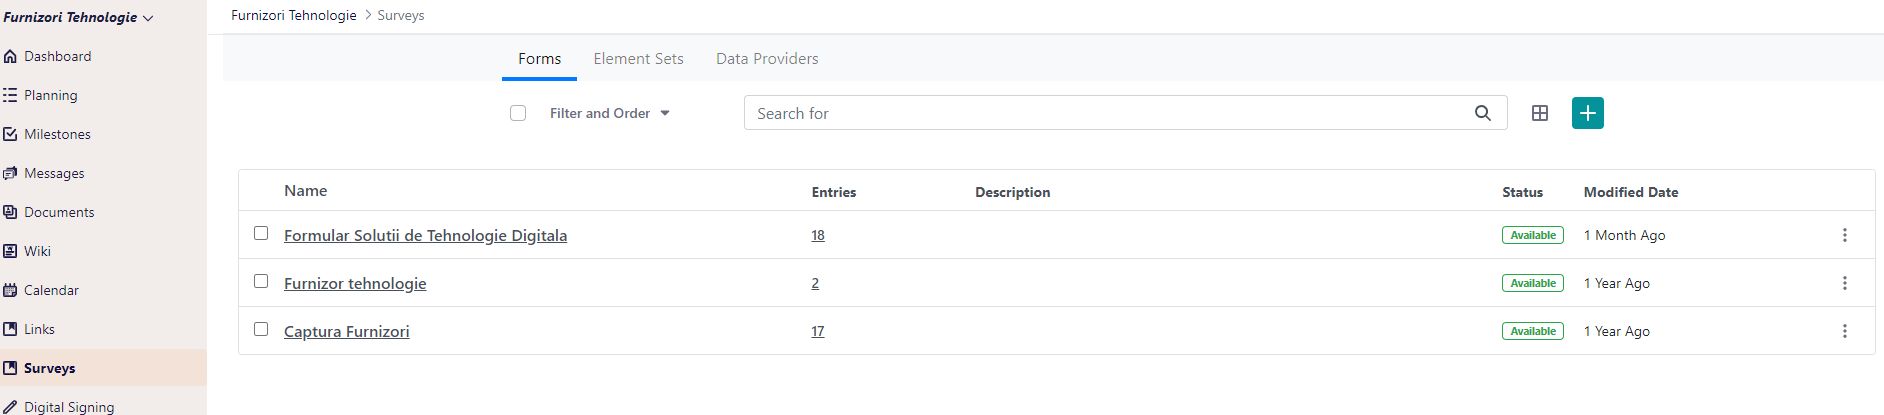
Survey Dashboard
-
- Table Columns:
- Name: The name of the survey.
- Entries: Number of entries submitted.
- Description: A brief description of the survey.
- Status: Current status of the survey (e.g., Available).
- Modified Date: The last modified date of the survey.
- Filter and Search: Use the filter and search options to find specific surveys quickly.
- Table Columns:
- Interacting with Surveys:
-
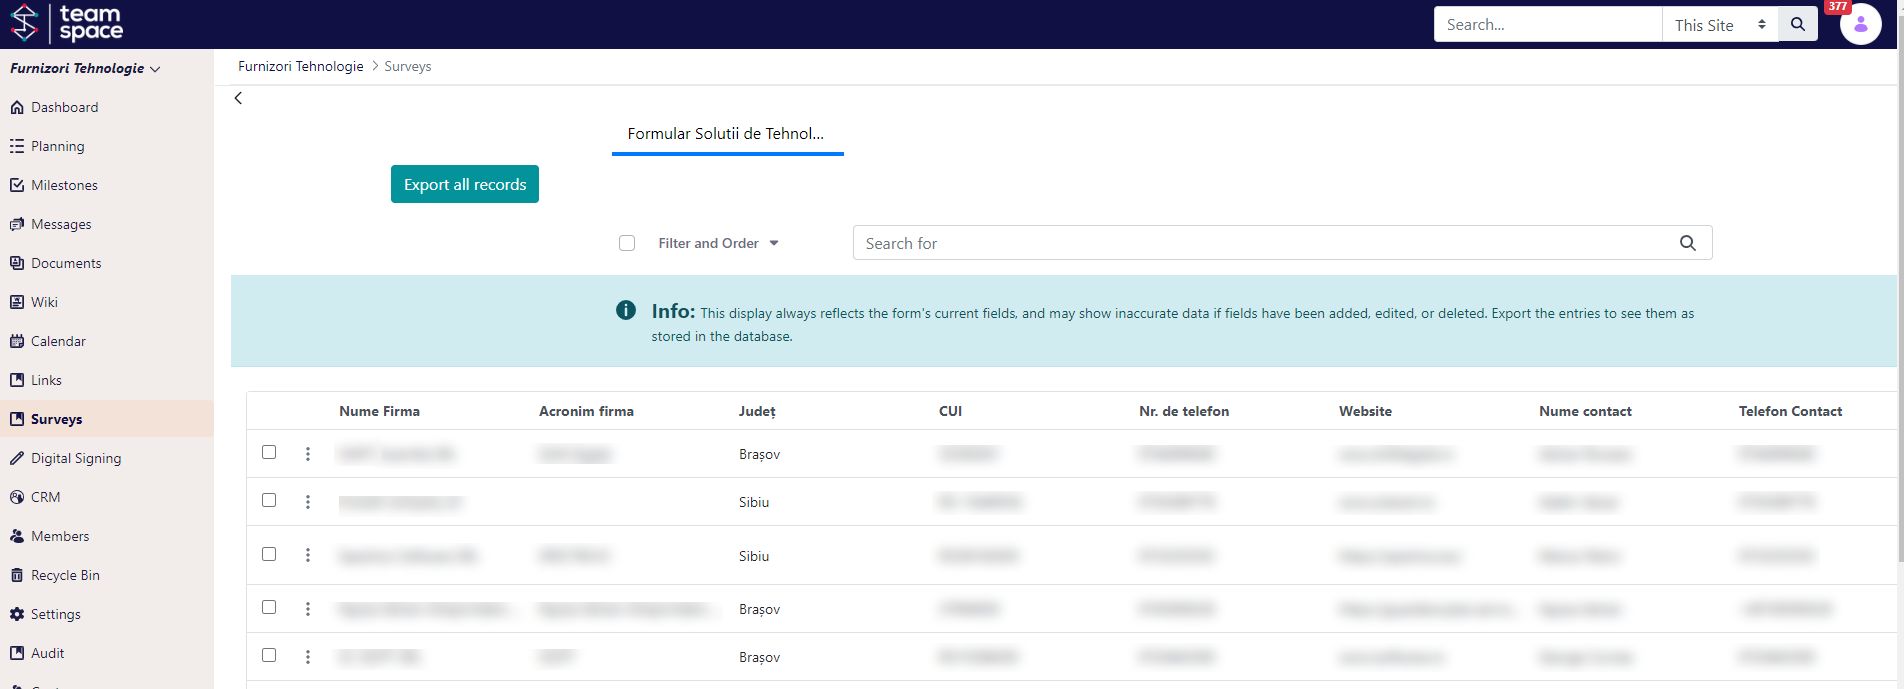
- View Entries: Clicking on the number of entries (e.g.,
18) will open a detailed list of entries for that survey - Edit Survey: Clicking on the survey name will open the designer view, allowing you to modify the survey’s content and structure.
- View Entries: Clicking on the number of entries (e.g.,
Adding a New Survey
To create a new survey:
- Add Survey: Click the
+button in the top-right corner of the survey dashboard to add a new survey. ( )
) - Survey Design: Use the designer view to create and customize your survey.
By following these steps, you can effectively manage and utilize surveys within Team Space to gather valuable feedback and insights from your project participants.
Using the Survey Editor in Team Space
The Forms widget can do a lot of things really well, but if you just need a simple form, how do you wade through all the features you don’t need? Is your simple survey going to make you late for that lunch outing you’ve been planning with colleagues at that new shawarma place? No!
Let’s create a simple yet elegant form, give access to the intended users, and get you on your way to lunch.
At Tech Conference, it’s important to capture attendees’ feedback about their experience. After a (hopefully) insightful session, attendees should receive an email with a link to a brief survey that prompts them to rate their experience from a list of selections, and add any additional comments they’d like in an optional field.
Viewing Forms
Whether creating a form or managing existing forms, it all starts in the same place: the Surveys in your Team Space project.
Building a Form
To add a new form:
- Click the Add button (). The form builder view appears.
- Name the Form: Replace “Untitled Form” with “Attendee Feedback Survey”.
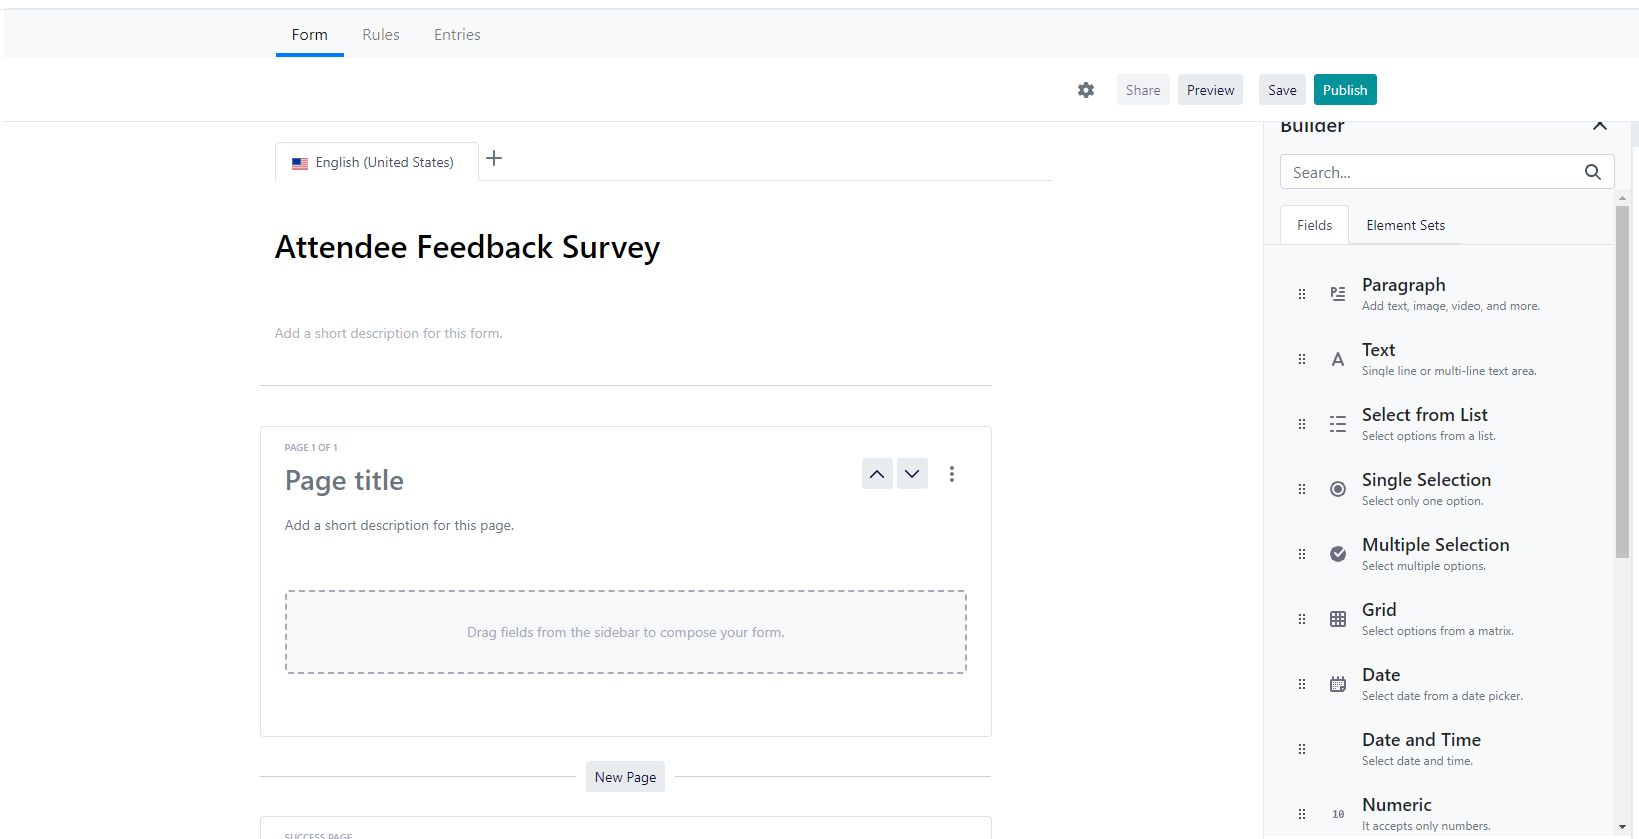
- Help Text: Enter “Tell us about your experience!”.
- Add Fields: Click the Add button (
) to open the sidebar if it’s not already opened.
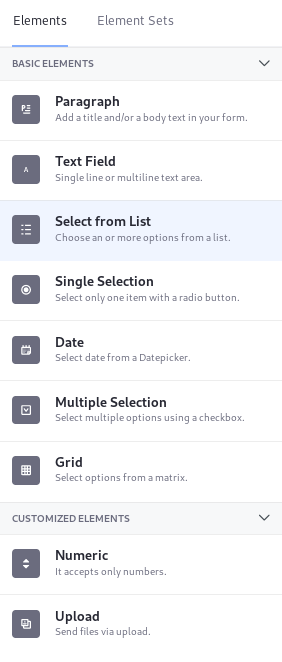
- Select Field: Drag a
Select from Listfield onto the form builder and configure it like this:- Label: Rate your visit to Tech Conference.
- Required Field: Turn this on to ensure responses.
- Options:
- Excellent
- Good
- Average
- Poor
- Text Field: Drag a
Text Fieldonto the form builder.- Label: Want to tell us more?
- Text Field Type: Choose Multiple Lines.
- Required Field: Leave unselected.
- Select Field: Drag a
- Save and Publish:
- Save Form: Click
Save Form. - Publish Form: Click
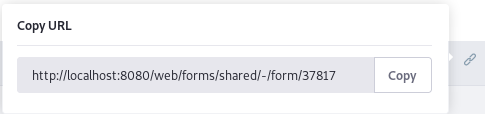
Publish Form. A dedicated URL to the form is generated.
- Save Form: Click
Accessing Forms

Once the form is developed and published, there are two options for getting the published form to targeted users:
- Place the Form on a Site Page:
- Add a page to the site and choose
Full Page Applicationfor the page type. - Add the Form widget to the page. Click the Configure Page button (
) and choose Form from the Full Page Application dropdown.
- Select the “Attendee Feedback Survey” form and save.
- Add a page to the site and choose
- Provide Direct Link:
- Copy the dedicated form URL from the form builder and provide it to users via email.
By following these steps, you can create and manage surveys effectively within Team Space, gathering essential feedback from your audience.
Introduction to Survey Entry Management
In Team Space, managing survey entries has become more efficient with several new functionalities. These options allow users to view, export, and manage survey responses seamlessly. Here’s a breakdown of the available actions for survey entries.
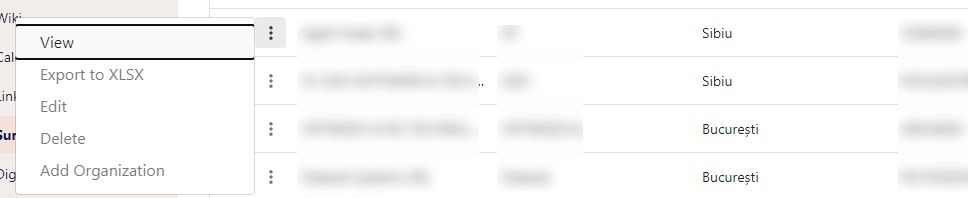
Survey Entry Actions
- View:
- Opens the detailed view of a specific survey entry, allowing users to see all the responses provided by the participant.
- Export to XLSX:
- Allows one or more survey entries to be exported in an XLSX format for offline analysis or record-keeping.
- Select multiple entries and export them together for comprehensive data management.
- Edit:
- Enables the user to modify the responses in a survey entry if corrections or updates are needed.
- Delete:
- Removes the survey entry from the system. This action is irreversible and should be used with caution to avoid data loss.
- Add Organization:
- Starting with a survey entry, users can create a CRM organization. This is particularly useful for converting survey data into actionable CRM records.
- For more details, refer to the CRM section of the documentation.
By utilizing these features, users can efficiently manage survey data, ensuring that all responses are handled correctly and integrated into other systems as needed.
Survey Rules
What’s the difference between a dolphin and a cat? Among other things, you can’t train a cat to perform complex tasks, while dolphins are highly trainable. If you’re skeptical, try teaching your cat to jump through hoops or play fetch. Better yet, get a team of cats to perform synchronized swimming. The Surveys application is much more like the dolphin, adaptable and trainable, and it’s only getting more capable as time passes.
Survey rules are a good example of the adaptable nature of the Surveys application. With survey rules, you can train your survey fields to behave as you wish. There are several things you can make them do:
- Show/hide: Based on a predefined condition, set the visibility of a survey field.
- Enable/disable: Use a predefined condition to enable or disable a field.
- Require: Use a predefined condition to make a field required.
- Jump to Page: Based on user input, skip over some survey pages directly to a relevant page.
- Autofill with Data Provider: Use a data provider to populate fields when a condition is met in another field.
- Calculate: Populate a field with a calculated value using data entered in other fields.
Survey rules are for changing fields and survey elements by acting on conditions.
If [condition] do [action].
If you’re not already familiar with the Surveys application, start by learning how to create surveys, add and configure fields, and then publish surveys. Once you know that, come back here to learn about survey rules.
The Anatomy of a Survey Rule
Each rule consists of one or more conditions and actions.
- Conditions determine whether any actions are executed.
- Actions determine what happens if the condition is met.
Rules are stored in the database in JSON format by default.
Creating Survey Rules: Rule Builder
Once you create a survey and lay out its fields, you’re ready to set up rules in your survey:
- Save the survey.
- Open the Rule Builder by clicking the Rules tab at the top of the Edit Survey screen.
- Add a Rule: In the rule builder view, you can now begin developing your survey rule. Click the Add button to get started.
Before looking at each type of rule condition and action you can use to develop rules, consider the OR selector box at the right side of the Condition. You can choose OR or AND here, depending on what relationship the conditions should have with the action.
- OR: The action is triggered if any of the conditions you specify evaluate to true.
- AND: The action is triggered only if all the conditions you specify evaluate to true.
This box becomes usable once you click the Add button to add an extra condition.
Conditions
Conditions are the gatekeepers of survey rules. If the condition’s if statement evaluates to true, the action is triggered. If it evaluates to false, no action happens.
A condition checks whether one field’s value:
- Is equal to a specific value or another field’s value.
- Is not equal to a specific value or another field’s value.
- Contains a specific value or another field’s value.
- Does not contain a specific value or another field’s value.
- Is empty. This assumes you want to do something if a field is empty.
- Is not empty. This assumes you want to do something as long as a field is not empty.
One exception to this is the User condition, which is the last option in the Condition dropdown menu. The User condition doesn’t act on a field at all. It checks whether a User belongs to a certain role. For example, if the condition:
If User belongs to Administrator
evaluates to true, an action is triggered.
A condition is the gateway into a survey rule, but actions define what actually happens when the condition evaluates to true. The remaining articles discuss the available actions and demonstrate their use.
Auto-Save
Losing progress on a partially created survey is frustrating. Make sure to save your work frequently while creating surveys. However, if you forget to save, Team Space has your back.
By default, a survey is auto-saved every minute. You won’t notice anything in the survey builder while the back-end auto-saves the survey.
Survey Success Pages
After users submit one of your surveys, what’s next? How will they know they’re done? By default, submitting a survey displays a success message and returns users to the survey’s now empty first page. Don’t leave users feeling uncertain. Instead, configure a Success Page. A Success Page shows users they’ve finished filling out the survey and their submission was successfully received. A Success Page can even urge users to close the browser window or tab.
Survey Pages
Are users more likely to abandon long surveys with lots of scrolling? Are they more likely to see a multi-page survey and abandon it without a second look, assuming that it gets longer and more tedious with every passing page? Such usability questions are worth thinking about. If you decide multiple pages are appropriate for your survey, Team Space supports two pagination styles: default, and alternate.
Help Text, Placeholder Text, and Predefined Values
Survey fields can have help text, placeholder text, and predefined values.
- Help Text: Appears as a sub-heading to the field label but doesn’t appear in the field entry area. Enter help text in the Basic tab of the field’s sidebar menu.
- Placeholder Text: Text in the field entry area that isn’t submitted if the field is left untouched by the user.
- Predefined Value: Text in the field entry area that is submitted if the field is left untouched by the user.
All survey field types can have help text, and all survey field types that accept user input can have predefined values. Only text and numeric fields can have placeholder text.
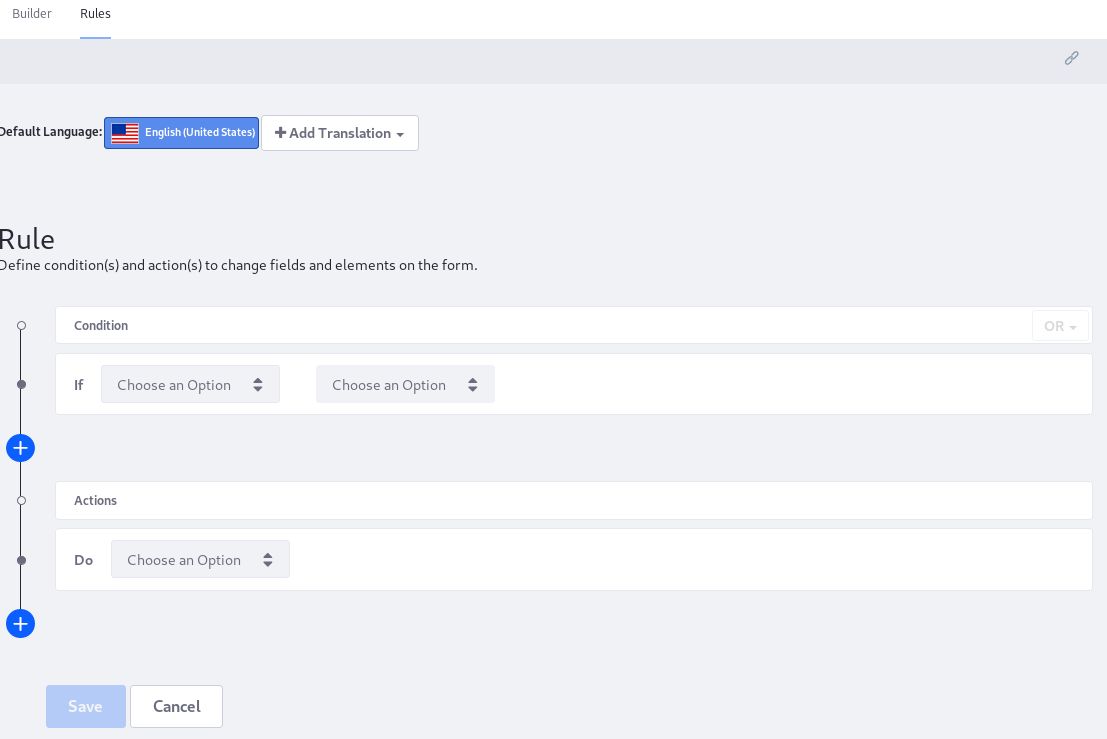
Validating Text and Numeric Fields
Validation ensures that only certain values are entered in a field. Validation functionality is available for text and numeric fields.
To enable validation:
- Add a Text or Numeric Field: Add it to a survey in the Builder view.
- Open the Field’s Properties Tab: Turn on the Validation toggle to enable validation and open its configuration options.
Validating Text Fields
Validation for text fields contains several options. You must first choose a list of available conditions to check:
- If Input Contains
- If Input Does Not Contain
- If Input Is not URL
- If Input Is not Email
- If Input Does not Match
If the condition isn’t met, an error message is displayed to the user. Where you go from there depends on which condition you used.
If Input Contains/Does Not Contain
When you validate text data to check if it contains a certain value, there are two additional steps to take after selecting the condition:
- Enter the text to check for.
- Enter an error message so users understand why their submission failed.
If Input Is not URL/Email
Checking for properly formatted URLs and emails is easy. Just choose the condition from the If Input drop-down and enter the error message.
If Input Does Not Match
The Does Not Match condition is used for entering regular expressions to create custom validation criteria. For example, use this regular expression to ensure that ten consecutive numeric digits are entered in a phone number field:
^[0-9]{10}$
If you use regular expression validation, provide some explanatory text (e.g., help text, placeholder text, and a clear error message) to guide survey users in entering the proper data.

Validating Numeric Fields
Numeric field validation is similar to text field validation, but the conditions compare the value of the number entered to some other value.
Available conditions to check include:
- Is greater than or equal to
- Is greater than
- Is not equal to
- Is less than or equal to
- Is less than
For example, to make sure users don’t enter a number over 10, enable validation and use Is greater than with a value of 10. Use the message “Please enter 10 or less.”
Note that numeric fields are text fields validated to allow only numeric data entry. That’s why they’re in the Customized Elements section of the survey fields list. In addition, the property “My numeric type is” (can be Integer or Decimal) on the Basic tab of a numeric form is another form of validation.
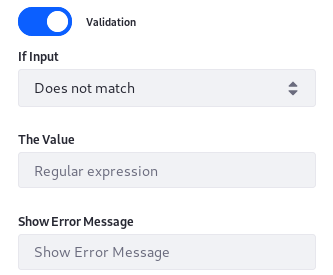
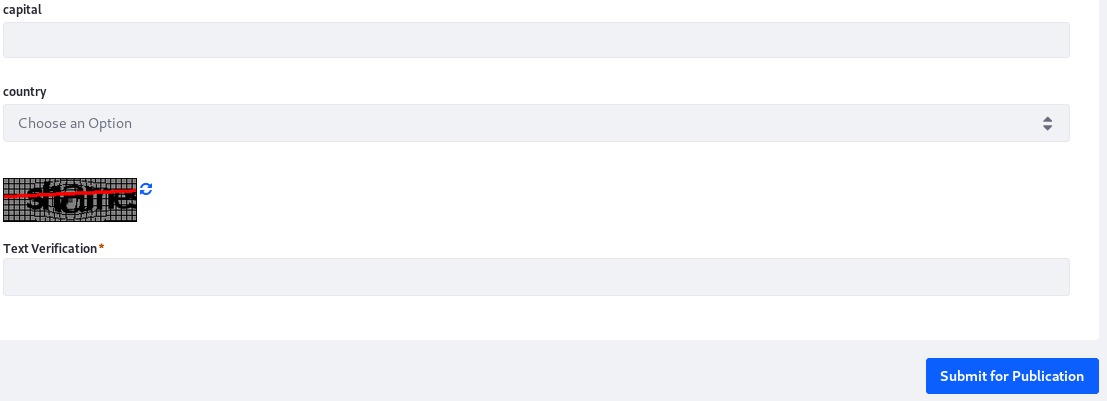
Enabling CAPTCHA on Survey Submissions
CAPTCHA prevents bots from submitting surveys. It’s often used in login apps, but you can also use it in the Surveys app.
To enable CAPTCHA, click the survey’s Options button and select Settings. Enable the Require CAPTCHA setting, click Done, and save the survey. That’s all there is to it!
Survey Notifications
You can configure the Surveys app to send a notification email each time a survey entry is submitted.
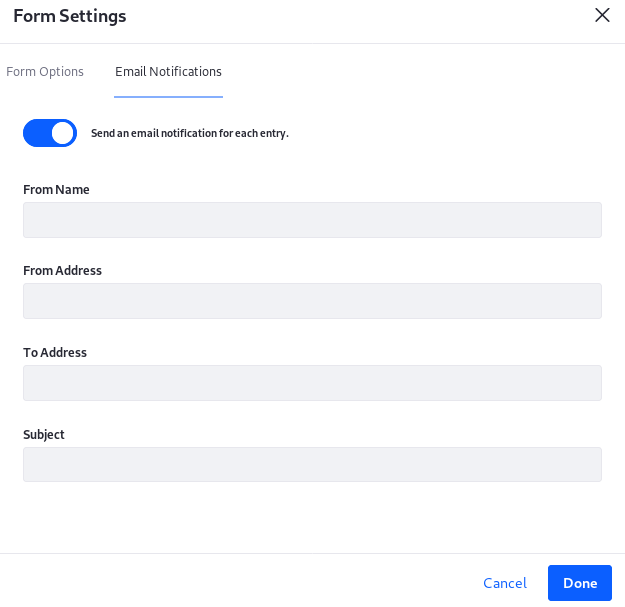
- Open the survey’s Form Settings section by clicking the Options button and selecting Settings.
- Click the Email Notifications tab, enable the option “Send an email notification for each entry,” and fill out these fields:
- From Name: The sender’s name. This could be the Site name, the survey name, or anything else informative to the recipient.
- From Address: The sender’s email address. You can use something like noreply@example.com.
- To Address: The recipient’s email address (e.g., test@example.com).
- Subject: The email’s subject. An informative subject line tells the recipient what happened. For example, “A feedback survey was submitted in Tech Conference”.
Redirecting Users
When users submit a survey, you can present them with another page indicating success or some other information related to their submission. Sometimes all you need is a success page, but other times you might want to send users to a specific URL.
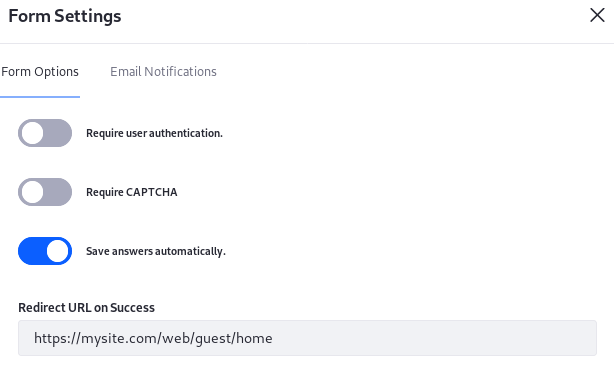
To set up a redirect URL:
- Open the survey’s Form Settings section by clicking the Options button and select Settings.
- Enter the redirect URL in the Redirect URL field.
Autocompleting Text Fields
It’s been scientifically proven that internet users are lazy (not you, of course—other internet users). For example, some users may not fill out your survey if you make them type the entire title of their country in a registration form. This is especially true if they’re filling out the form on their mobile devices. You can make users’ lives easier by configuring auto complete on a survey’s text fields.
Why not just use a select field with a data provider to guide user input? Sometimes a data provider can’t encompass all possible field entries. For example, if your data provider doesn’t include fictional countries, users from that country wouldn’t be able to enter anything into the select field. Alternatively, you can use a text field with auto complete so users can begin typing their country’s name and then select it from a list when it appears. Auto complete combines a text field (accepting any response that meets your validation criteria) and common choices to select from. It’s a win-win situation.
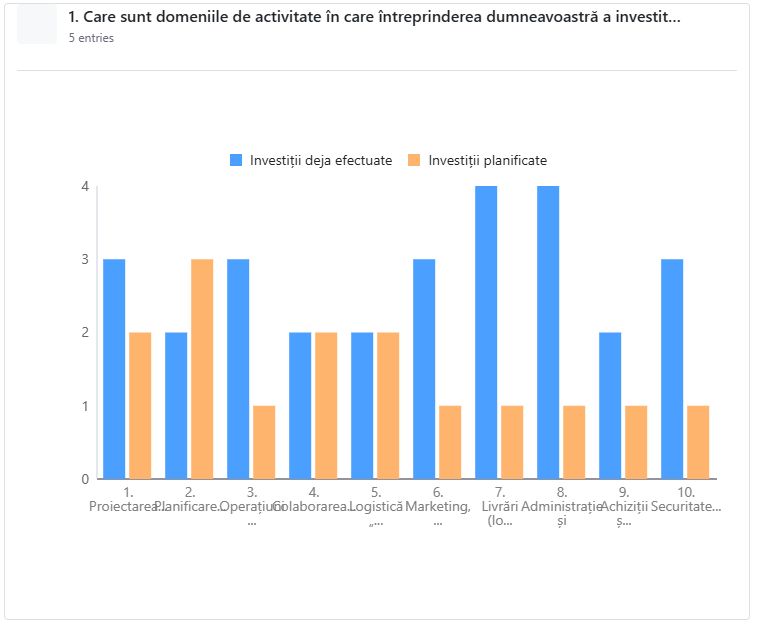
Survey Report
Report is an essential tool automatically generated to facilitate the use and analysis of survey data by project members. By structuring the data in an accessible and visual manner, the report allows users to quickly access relevant information and gain a clear picture of various aspects collected in survey.
Key Features of the Report
- Automation: The report is automatically generated, saving time and effort for users while ensuring accuracy and consistency of the presented data.
- Usability: Project members can directly use this report to make informed decisions, monitor progress, and evaluate the impact of interventions.
- Data Visualization: The report includes both detailed tables and various charts, facilitating the interpretation and analysis of survey data.
Elements Included in the Report
- Tables: These provide a detailed presentation of basic data, i.e. : name, contact person, role in the company, company size, and other relevant information.
- Charts: The variety of charts (e.g., bar charts, survey charts) helps to visualize data clearly and concisely, highlighting trends and correlations among different aspects
- Other Elements: Descriptive text and links provide context and access to additional sources of information.


Benefits for Project Members
Using this automated report allows project members to:
- Quickly and efficiently analyze the collected data.
- Identify trends and patterns in the survey data.
- Make informed decisions based on concrete evidence.
- Effectively communicate results and conclusions with other stakeholders.
In conclusion, report represents a valuable resource for project members, providing easy access to essential data and supporting them in the analysis and decision-making process.